As I’ve mentioned in previous posts, post radiation treatment for prostate cancer (I”m doing okay so far; as always, we keep monitoring), I’m having a little trouble emptying my bladder completely, so my urologist has put me on a “timed evacuation schedule”, or “go pee every two hours”.
[Side note: prostate cancer is a very undignified disease. I have had many ultrasound probes in my bum, injections right below my scrotum (and the experience of exam stirrups — you have my sympathies if you go to a gynecologist)…talking about urinating on a schedule is mild.]
Now for a human being, that’s seems like a simple directive. You get up in the morning, go pee, wait around two hours, pee again, and so on until you go to bed, with whatever else is going on and life happening as usual. Repeat.
As I have mentioned, however, I am extremely time-blind, so having something remind me (and track my compliance) is very useful. Trying to turn “every two hours” into a flexible algorithm, however, is non-trivial.
The medical basis
First, let’s break down what the urologist really means and wants you to do when they say, “I’d like you to start urinating every two hours”. There’s quite a bit of literature on the subject of timed voiding, and I’ll post a few links here as a starting point.
Wallace, S. A., Roe, B., Williams, K., & Palmer, M. (2004). Bladder training for urinary incontinence in adults. Cochrane Database of Systematic Reviews, (1). https://doi.org/10.1002/14651858.cd001308.pub2
Wyman, J. F., Burgio, K. L., & Newman, D. K. (2009). Practical aspects of lifestyle modifications and behavioural interventions in the treatment of overactive bladder and urgency urinary incontinence. International Journal of Clinical Practice, 63(8), 1177-1191. https://doi.org/10.1111/j.1742-1241.2009.02078.x
The summary of what the doctors have to say is that there are two different situations that interval-training your bladder is useful for.
If you go too often, then we want to calm down your nervous system and get it used to waiting longer to go [Wyman 2009]. So the goal is making it all the way to the two-hour mark before going, and getting the patient used to holding it longer. For them, early is worse.
If you don’t go often enough, the situation is quite different. In this case, you’re trying to prevent the bladder from getting too full and stretching the detrusor muscle, which is the one that contracts to empty the bladder. Overstretching it makes it weaker, and it therefore has a harder time contracting enough to completely empty the bladder.
Underactive patients may go earlier than their two-hour mark, especially if they know they won’t be able to go exactly then, to keep the detrusor from getting overstretched.
For them early is okay, but going too often can make the bladder shrink and cause it to get overactive. Trying to prevent missing the mark is more important than strict adherence to a preset schedule.
Translating this to an algorithm
You will no doubt notice that a lot of words in those detailed descriptions are extremely approximate. “Go every two hours” is sort of the Platonic ideal of timed voiding, and is not what can happen, or needs to, in the real world. Sleeping and waking, appointments, driving places, etc. all serve to push people off that perfect schedule.
We therefore have to devise a way to come as close to the “every two hours” ideal as possible with a monitor that can flex where it’s appropriate, and be hard-nosed where it isn’t. The actual logic of this is quite complex!
We start with the primary rule: the next event should be two hours after the last time you went.
If you missed the window (extra early, or more than 10 minutes late), then we adjust the next scheduled time to be 2 hours on from the last time you went.
There need to be quiet hours: these allow you to sleep. There are no alerts during quiet hours, and any events during quiet hours are excluded from the schedule calculations, though they are recorded. (If you had to get up and go three or four times, that’s useful for the urologist to know.)
We assume that the end of the quiet hours starts a day.
By experience, we determined that days may need to have a soft start.
A hard start decides that the end of the quiet hours is start of a new day, and the first interval begins then.
A soft start assumes a buffer around the time that ends the quiet hours. An event in that timeframe is saved; the user chooses whether it’s the actual start time by indicating that they’re up and starting their day, effectively doing a hard start from that point.
The user can also say they’re going back to bed. If that happens, then the interval is just saved as an extension to quiet hours, and the day doesn’t officially start until the next event where the user selects “I’m up”. If they log an event in the quiet hours buffer but don’t select “I’m up”, the day officially starts anyway exactly one interval after the last event recorded in the quiet hours buffer (or at the end of the quiet hours buffer if no events were recordedin the buffer). If more than one event is recorded during the quiet hours buffer, the latest one is chosen as start of day.
During the day, regularity is more important that an exact clock time, so each event has a compliance buffer. 15 minutes before to 10 minutes after the scheduled event, if an event occurs, it’s counted as the scheduled event, and we schedule the next one from the current scheduled event time. Example: event time is 1pm; an event anywhere from 12:45pm to 1:10 pm counts as 1pm.
If the event is recorded outside that buffer, we reset the clock to calculate event scheduling forward from the event instead of the schedule. For instance, if again, the event is scheduled at 1pm, but you go at 12:25pm before going out shopping, the interval resets, and the next scheduled time will be 2:25pm instead of 3pm. Equally, if you didn’t go till 1:20pm, the interval would reset, and the next interval would end at 3:20pm instead of 3pm.
There is a surprising amount of complexity in being flexible.
Yummy, yummy dogfood
Interestingly, most of this had to be derived by living with the app and discovering what worked and what didn’t.
First cut: two-hour fixed alarms, quiet period, hard day start
variability in needing to go while starting led to feeling pressured to try to go extra early — this actually is medically contraindicated!
Second cut: drift intervals – switched to recording the event, and always resetting the next interval to start at the current void event
this was super easy to live with, but led to a wild variance in interval lengths, almost defeating the idea of being on a schedule at all.
Third cut: back to fixed intervals, add buffer
kind of okay; the buffer allowed the schedule to not be too restrictive, but there were still occasional situations where the event was missed by a half-hour or 45 minutes, and then the next event followed on too quickly
had a day where I woke in the middle of the night and couldn’t get back to sleep, and the app started pinging me at 7am, not long after I finally did go to sleep
Fourth cut: allow soft day start, with the app not alerting until either an event was posted during the quiet hours buffer, or after a full interval elapsed after the end of the quiet hours (or the latest event in the quiet hours buffer)
Almost right. If sleep was irregular — early up or slept in — I could choose to say “going back to bed” even if I had an event in the quiet hours buffer and not have sleep interrupted until quiet hours plus one full interval and a bit
It was possible to wake up early, decide that I wasn’t going back to sleep, and start the day then.
Still the problem with extra-short intervals if I delayed from the fixed schedule. Led to consistently going late to even up the intervals, defeating the purpose of a schedule at all
Fifth cut (current): restore the floating intervals and use the event buffer at intervals. Combines being flexible about start of day and adds a flex around the intervals too; an early event to avoid having to make a stop on the road didn’t reset the interval if it happened in the event buffer.
I’m testing this version now to see if it stays unobtrusive enough to proceed forward with it
Other items
Getting the live activity working properly was a pain, but it’s really nice to get an alert, tap live activity, and have it seamlessly open the app and record the event, or take me to the dashboard so I can say yes or no to “are you getting up?”.
Making it pretty will be necessary if I decide this is worth releasing on the App Store. Right now it’s very basic SwiftUI: functional, but not a lot more. Which is appropriate for testing, but some serious thought needs to go into art: a color scheme, a much better icon, etc.
Also need to figure out what would be useful for my urologist to get in terms of a report.
I’ve realized that there are actually quite a few people who’d like to listen to my show — or even listen to it again — that really want my podcast back.
So I’ve gotten back into the (very long) backlog of episodes.
One problem I’ve found is that Music.app has, at least a few times, lost its little mind and I’ve had to rebuild my libraries from scratch. This means that I’ve both lost some tracks (breaking the historical record that I was using my saved playlists for) and lost some playlists altogether.
I decided that the easiest thing to do was try to automate this as much as possible. Since I’m an Apple developer, that $99 a year pays for access to ShazamKit, which means I can write a command-line Swift program to feed a podcast and have it (try, at least) to recognize the tracks and reconstruct the playlist.
Experimenting with the RadioSpiral library, it’s pretty good at recognizing moderately popular artists like Palancar or Robert Scott Thompson, but stumbles on more esoteric picks like Una Voce.
I’ll give it a try across my episodes and see how well it will work.
And I’m definitely going to find a safer backup for my playlists.
I got a mail in early September from Alex Crabb, who had downloaded the sd1diskutil code from GitHub, and was trying to image some 35-year-old disks from his dad’s SD-1. (Pause while I feel old for a minute.)
He was able, using a GreaseWeazel setup, to get some MFM flux transition files from the one disk he could not get to read, and asked me if I could see if we could get anything off of it.
We had both an HFE file (which sd1diskutil does know how to read directly) and an SCP multi-pass read one, which at the time I got the files, it did not know how to read.
Step 1 — Try the HFE directly
sd1cli hfe-to-img failed immediately:
Error: HFE missing sector at track 0 side 0 sector 0
Raw inspection of the HFE showed only 255 of 1,600 sectors readable (15.9%). This was pretty bad news already, and I was worried we’d not be able to get anything at all off the disk. Fortunately, there were no CRC errors on what was there — the data that survived was clean, just very sparse.
The damage pattern was worst on early tracks (0–15), exactly where the OS, FAT, and directory structures live. Ouch.
Revolution header: index time (LE u32), flux count (LE u32), data offset from TRK start (LE u32)
Flux data: big-endian u16 values in 25 ns ticks between flux reversals
Inspecting the first few flux values gave us our in — ~80, ~160, ~240 ticks mapped cleanly to 2 µs / 4 µs / 6 µs, which are the three legal MFM inter-flux intervals for 250 kbps DD.
Excellent! We’re not fumbling in the dark altogether. Quantizing these to the nearest 80-tick multiple gave us a clean MFM bitstream.
The SD-1 uses standard IBM/ISO MFM: A1* sync marks (0x4489), IDAM (0xFE), DAM (0xFB), CRC16-CCITT, so our existing HFE decoder logic ported directly. Lucked out big.
SCP result: 1,178 / 1,600 sectors (73.6%). This was a 3-revolution capture from the disk, and it recovered a lot more than the single-pass HFE.
Claude’s script to do this was saved as tools/scp_to_img.py.
Lots more sectors! Was it enough?
Alas, it was not. Still a ton of damage where we really needed it: in the directories.
Step 3 — Merge SCP + HFE
We did our own Hail Mary here, on Claude’s suggestion, and tried merging the HFE MFM decode with the SCP one. They were both from the same Greaseweazle session, and the guess was maybe one had data the other did not.
Cross-checking found 109 sectors the HFE had that the SCP missed — mostly whole tracks (T35S1, T51S0, T55S0, T57, T59S1, T61S1, T77S1, T78S0) where the SCP flux decoder apparently lost sync but the HFE decode succeeded. Would this image make the cut?
Merged result: 1,287 / 1,600 sectors (80.4%).
Saved this new tool as tools/merge_scp_hfe.py.
Step 4 — Assess the files
Sadly, no.
Despite 80% overall recovery, both files were in the most-damaged zone (early tracks 0–14):
File
Blocks
Readable
Status
ALEX 96
59
19 (32%)
Severely damaged
MUZAK 3
12
5 (42%)
Unrecoverable
FAT damage (blocks 5–14): FAT block 6 (covering entries ~171–340) was unrecovered, breaking MUZAK 3’s chain after the first block. The contiguous block count in the directory entry let us bypass the FAT and work directly with physical blocks.
MUZAK 3 (OneSequence): 7 of 12 blocks missing, including a contiguous run from bytes 512–2559. The SD-1 cannot load a sequence with holes. Unrecoverable.
ALEX 96 (SixtySequences): 40 of 59 blocks zero. The 60-slot header region (blocks 23–44) was mostly destroyed; only headers for slots 0 and 1 survived intact. Slot 1 had a readable header but its event data fell in a missing block.
We saved this recovery extractor as tools/triage_sequences.py.
Step 5 — Extract that one intact sequence
SixtySequences layout places the event pool at file offset 11,776, with sequences stored in slot order, each padded to a 512-byte boundary. Slot 0’s event data (70 bytes) lands in the very first event-pool block (disk block 46), which was recovered.
Wrapped up the 70 event bytes as a SingleSequence SysEx (F0 0F 05 00 00 09 [nybblized] F7) and saved it to extracted/ALEX_96_slot00.syx.
Saved this very custom tool as tools/extract_intact_sequences.py.
What did we get?
1 sequence from ALEX 96, slot 0, 70 bytes — valid, loadable by SD-1 hardware.
Everything else on the disk is unrecoverable.
Had to report this sad news to Alex, who said, “I am going to check the Logic projects I did a long time ago in early 2025 because I’m almost positive that disk was one of the ones I was able to load onto my dad’s SD-1 and play the sequence into my DAW, track by track, syncing everything up to the count off clicks …”
So, in summary good(ish) news! The data had been saved elsewhere by other means, and the failure to read the disk wasn’t a complete loss.
Lessons / Notes for Future Recovery Attempts
The failure is consistent with magnetic decay from the outside in, very common as floppies age: early tracks (0–15) are worst, later tracks (30+) are largely intact, outermost tracks (55–78) have scattered whole-track losses. The critical OS/FAT/directory structures on tracks 0–1 took the worst hit.
The disk was readable enough to identify and partially decode, but the files themselves were sadly stored in the most vulnerable zone.
So now we know what to do if we want to try recovering old disks in the future:
Always capture SCP + HFE in the same Greaseweazle session. The two decoders have complementary failure modes and together recovered 109 more sectors than either alone.
More SCP revolutions help. This file had 3; 5 or more is probably better for marginal sectors. Greaseweazle supports --revs N. There’s no reason not to do ten or twenty other than total file size. As damaged as this disk was, though, this probably still wouldn’t have gotten all the data.
The contiguous block count in the directory survives FAT corruption. When FAT chains are damaged, the contiguous_blocks field in the directory entry lets you still locate file data.
Early track damage is the worst case for SD-1 disks. The OS loader, FAT (blocks 5–14), and directory (blocks 15–22) all live on tracks 0–1. A disk that looks mostly readable (80%) can still have completely inaccessible files if those tracks have failed.
SCP format gotcha: the "TRK" magic is 4 bytes (TRK\0), not 3. The flux count and data offset are both relative to the TRK header start, not the file start. Flux values are big-endian u16 despite the rest of the SCP header being little-endian.
Final thoughts
Despite our not getting the data, at least Alex was able to find out what was on there (at least partially), and know he had it from other sources.
It wasn’t a completely useless exercise, as we’ve been able to add some more recovery tools to the library’s arsenal.
I did find it interesting that Claude generally prefers to use Python over reusing the library code; I suspect that’s because it’s easier to reason from a much larger corpus of Python than Rust.
In any case, we’ve significantly expanded the capabilities of the library to recovery from just format conversion, and that was a worthwhile thing to spend time doing.
In 2024, we took our first return trip to Malaysia since the 1990’s. We thought we might need a laptop for the trip, so I picked up a 2015 MacBook Air. Soldered memory, unfortunately, so the 8GB max was all we were going to get, and a 128GB disk.
Somehow we managed to cram enough working files onto a disk a quarter of the size of Shymala’s daily driver onto that machine and get Sequoia on it.
It ran very, very hot. And very slow. So much so that we ended up not using it much at all.
Fast-forward to 2026, and we’re planning another trip. We actually do need a working machine to manage, or at least monitor, our investments while we’re on travel.
None of our daily drivers was light enough, or riskable enough, to take with us, so I started looking at options.
Option 1: a Mac Neo. For about $700, I could get a Neo with 8GB memory and a 512GB disk. This would jump everything way forward, but a 512GB disk and 8GB memory might be enough, or it might not, and $800 is still expensive for a “this might get stolen” machine.
Option 2: a refurbished M-series Air. Least-expensive option here is still about $1000 (M4, 512GB disk, 16GB memory — honestly a tremendous value for a machine that stays home but felt like a risk for a travel machine).
Option 3: do something with this Air to make it work. This felt like the cheapest and least-stress option, but there are constraints.
The real bottleneck on this machine is storage. We were not going to be able to do anything about the memory: we did get a maxed-out 8GB machine but only a 128GB disk was affordable. (OWC is a great source for older Macs, but if I wanted a big internal disk, the prices were extortionate.)
The internal SSD is user-replaceable, at least; the real problem with the previous trip was trying to run Sequoia on a machine that was extremely strapped for disk space. No swap, no disk space left; it ran hot and slow.
So what can we run that doesn’t stress the machine too much?
I first tried running Elementary OS as the most Mac-like Linux option. Elementary does not like the Air. I tried multiple variations of installs and tweaks, and it just would not run on the machine.
Okay, second option: let’s drop back to a “this absolutely will run” option and see how that works. Linux Mint was the recommended distro, and it did indeed work like a charm. Installed easily, ran great. Had the usual mess with the wifi, but tethering the machine to my phone to have internet until the drivers could be forced to build and install covered that.
It was relatively easy to configure Cinnamon, the Mint window manager, to look pretty much like MacOS, and to install modificatons to properly use command-whatever instead of a Windows like control-whatever for keyboard shortcuts. It ran fast and well.
Two shortcomings, though.
It still had a lot of “this is not a Mac” feel. I anticipated a lot of pushback from Shymala on this, and rightly so; if you have a work rhythm, having something intrude to say “no, you have to do that this other way” is jarring.
It could not run Numbers. Our financial planning is all implemented in Numbers, and porting it all to Google Sheets would a) be a ton of work, b) be a ton of repeated work, and c) put our finances on the servers of a company that decided “don’t be evil” was too limiting, In addition, if we suddenly lost access to the associated Google account, we’d have to build the whole thing from scratch again.
So we needed a MacOS solution again.
I had mistakenly gotten the idea that the 2015 Air was stuck at Mojave like the 2012, and had dismissed trying to just run whatever it could run natively, but I discovered that both it could run Monterey, and that upgrading the internal SSD to 1TB would cost me less than $300; this meant that I could get an 8GB, 1TB machine for $600.
This was a no-brainer.
I ordered the disk from MicroCenter (interestingly when it arrived, it had a $499 sticker on it! I checked, and yeah, I only paid $300), and a $20 adapter so it would fit the Air. The most difficult part was finding the pentalobe screwdriver I needed to get the back off the Air! I finally found a “phone repair toolkit” from WalMart for $20.
The disk showed up and it was ridiculous. It was the size of a stick of gum.
Teardown was easy.
remove the screws, pull on the edge of the back to open it up.
pull the battery connector loose so the machine couldn’t accidentally power up while I was working
remove the T3 screw holding the SSD in place.
pull the old disk out and pivot it up a little to get it to pop out. (The old disk was an OWC upgrade to 128GB! Thing must have had like NO disk space when it shipped.)
Slip the adapter onto the new disk’s pins, then reverse the removal to install the new one. Took a little push to make sure the disk was seated in the adapter, and the adapter was seated in the machine.
Put the disk retaining screw back.
Reconnect the battery connector.
Put the back on and reinstall all the screws (I hear you saying, “NO NOT YET”, and yes, you’re right.)
Awesome! That was easy.
Power up, hold down the magic key combo to start internet recovery, wait…and it doesn’t see the disk. Okay. Maybe it’s just not formatted. Run Disk Utility…and there ain’t no disk.
Tear it down again, check all the connections, don’t put the back on again yet, just lay it in place. Try again. Still no disk. Check connections again. Looks fine.
Panic. Did I fry this brand-new disk?
Oh, wait. Here’s this card that came with the disk adapter, which says in teeny-tiny print that internet recovery doesn’t work with NVMe disks, and that I need the official Apple installer.
Well, poop. Fine.
Download the installer, follow directions to write the installer to a datastick. Go shopping while the installer app very slowly writes a bootable installer to the datastick.
Come back, insert the datastick, boot up from that, run Disk Utility and there it is. Whew. Format it GUID and Apple format. Exit, install Monterey…and there’s the disk! Woot!
Installer ran fine (if slow); reboot came up, finished the Monterey install, and all is well.
Currently using the Air for browsing, verified Numbers works fine here. All good. So for about $625, I have an excellent alternative for the trip, and no one will be depressed if something happens or it dies.
Followup post the trip
I ended up installing Ventura as well in a separate partition, since I had a lot of disk space available. Ventura was a lot closer to Shymala’s Sequoia install; I had to fight pretty hard with Dropbox to get it to install the auto-download and sharing features, but I eventually managed to. Monterey doesn’t support this at all.
Monterey also absolutely cannot run Chrome. Venture could, but the fans seriously spun up when I did.
On the hotel wifi, Ventura network performance was abysmal,and I could not run any Second Life viewer whatsoever. Every one crashed instantly.
I dropped back to Monterey, and network performance was fine.
Shymala needed to use the laptop to do some prep for a reading, and Monterey’s “I can’t download that file when you click it, you have to make Dropbox do it, and I think I’ll decide to not download anything at all now because” was a serious issue. She was in writing flow, which is not a time to explain, “no, see, we need to reboot into the other OS and then the software you need will work”.
On the other hand, if most everything is in the cloud and I’m not trying to do iOS development on the machine, it was quite easy to share the 1TB disk between two people, even with multiple OSes loaded. A Mac Duo would probably work fine as a travel machine as long as we both have an external disk for data.
The 2015 Air was a noble experiment but is not a long-term option as a Mac. Either I’ll swap in the old disk, or repurpose it as some kind of a Linux box.
I subscribe to Recommendo, a mailing list from Kevin Kelly and Mark Frauenfelder. I used to read Boing Boing a lot for interesting stuff; I just took a peek and it’s mostly trivia now. Admittedly, some is interesting. (The sea permanently changing color in 1907 was a new one.) Generally, it hasn’t had much for me of late.
Recommendo reminds me of the Whole Earth Catalog: intriguing tools and sites, Useful things. So I keep that one going.
And in particular, the site Text As Music was a great find.
You take a sample of your writing, paste it in, and it tells you what the statistics are, in terms of sentence lengths:
Micro: Very short. One or two words.
Short: Less than five, more than a couple.
Five: Well…five.
Medium: My best guess is that these are less than ten words.
Long: my usual elliptical blithering with parentheticals, asides, and dependent clauses.
The idea is that your text should have a variety of sentence lengths. Tiny. A bit longer, still short. Sentences that stretch out a bit. And the indulgent, let’s-ramble-a-little, longer sentences, that tease out more of a thought.
I’ve tried a few of my blog posts from here and okay, I am not a short-sentence guy. Most of mine are mid-size or long. I will blame my eighth-grade English book for all the frowning it did at sentence fragments. Which are useful, so there.
And I am someone who likes musical prose, so seeing the long stretches of long sentences made me think, Okay., Punch it up some, huh? You do not need to Molly Bloom the hell out of every thought.
So I’m going to go ahead and write as I do, but then look back over it and see where I can make those breaths and pauses. Where I can land a thought. Be terse, where it works.
I think I learned to write in an academic setting more than anything else, and a long, well-rounded sentence that covers all the bases and properly excuses itself having the temerity to have like, an opinion, is a commonplace. So, no.
I will be having short ones. And the long ones, too, still a place for those; but this is definitely a think to think about. Much appreciated!
(And yes, there’s a “have AI improve your rhythm” prompt on that page, but I want to learn to play the drums. I don’t want a drum machine.)
Tried it for this post; it’s definitely an effort! (I do get credit for short sentences when I use semicolons. Small blessings, I guess.)
A quick summary of a bunch of stuff I’ve done lately.
Developed a new special interest: the LGP-21. A real physical one was just recently revived by Usagi Electric, and his watchers have created a simulator and toolchain for this remarkable old machine — remarkable in that despite its relative primitiveness, the programmers for that machine back in 1963 created some impressive software for it.
Wrote some extensions for the lgp21-tools assembler: a test suite, and a macro facility (which may not get merged, but I can use it im my copy)
Ported a couple of BASIC computer games to the LGP-21, including good old WUMPUS, BAGELS, and an implementation of Steve Jackson Games’s Zombie Dice.
Translated the German LGP-21 Subroutine Manual (nowadays we’d call it the Software Library or somesuch) into English in LaTeX markup. (Learned a fair amount of LaTeX in the process. Like it!)
Continued working with the timed-voiding app. Working pretty well now, with over a month of data recorded. Added data export today (working) so it can be analyzed by the LLM of your choice, and currently continuing to refine it. It may make it to the App Store sooner or later.
sd1diskutil continues to evolve; between Sojus and I, we may have killed the final bug in the library, and it looks like it fully supports all file types.
Car research tabled for the moment.
Felt a little uncomfortable implementing Zombie Dice for the LGP-21. Admittedly we have an installed physical user base of exactly one machine, and maybe a half-dozen people who might try running it on the simulator, but it’s still a registered trademark of SJG. So I thought up a new game altogether that turned into a combination bidding war and Zombie-dice-like press-your-luck game. Rules complete and a tentative deck of cards made up, but I need to playtest it to see if it’s actually anything before trying to program it. It reminds me a LOT of the Cheapass games of yore.
Surgically removed the Chrome 4GB model download.
Big data storage cleanup, still ongoing.
Found out I’m still missing a bunch of music from my iTunes library. May re-up the iCloud Music library to recover it. Which will mean Yet Another iTunes library Merge. Song Sergeant does a great job cleaning up after one of those.
Did a lot of spreadsheets for changing investments in the current economic situation. Too specific to post about.
The last few days have been devoted to other things like dental emergencies, but the app continues to shape up.
I discovered that expecting live activities to do much beyond show you something and open the app if you tapped them is quite fragile and can make things very complicated. Switching that over to just an “open the app with a custom URL schema” both made the app a lot simpler and a lot more dependable.
I took a refactoring pass at the code, and I’ve isolated the “what state is the app in now” into a single oracle class that takes in all the data (quiet schedule, interval since last event, current time, and so on) and figures out the state of play. All the other parts of the app just look at the oracle’s computed app state and then proceed based on that.
This means I can mock the oracle and easily test all the rest of the behavior of the app, and I can mock the oracle’s inputs and validate that it makes all the right decisions.
This vastly simplifies the app and makes all of it testable, so I can get a little more ambitious:
The app can query (if the user permits) HealthKit and get a “quiet time” estimate from collected sleep data
I can make the quiet-time boundaries a little more squishy to deal with early-morning wakeups and shifting the start of the window to match
The recording is dead simple and accurate. No more lost events.
So far I’ve got something that does a good job of posting the reminders and recording the data; now I can get after making that recorded data more useful to both the user and to their urologist.
It’s now an app that acknowledges (and explains) that you have two different situations where you do bladder training: going too much (the more common situation) and going too little (the less-common situation I’m in).
It’s still very utilitarian straight-out-of-the-box SwiftUI, but: ship working code, then repackage with beauty.
Very happy with it, it’s working great for my use case now; even if I didn’t refine it further, it’s helping me keep on schedule with my bladder training.
I’ve gotten to a decent beta at this point, and I’m eating my own dogfood: my urologist put me on bladder training with a two-hour interval, so the app is set up with that as the default interval.
I’ve been testing it as I go along and added a few things that I needed:
Custom alert sound. I get enough alerts that I need it to sound different than the others. I’ve got a nice water-drip noise, distinctive but not obtrusive, that fires when the interval is up.
The process is not loads of fun, so I’ve added a little whimsy to the alert messages.
I’ve got a live activity so I don’t have to unlock the phone to reset the interval when I go.
Added quiet hours so it doesn’t ping me every two hours when I’m trying to sleep.
Explanatory “why the hell are we doing this anyway” text. Okay, I don’t need that, but it’s useful for someone to refresh their memory, or to get an explanation of why we’re doing it if their urologist has said, “make sure you pee every two hours.”
Running with this version a while to see what else it needs. Will look into art and design after it’s functional.
So one of the things that can happen after prostate cancer radiation treatment (and I note that I don’t think I’ve written a post about that — I suppose I was a bit distracted at the time) is that you can develop what’s called a stricture, ot narrowing, of the urethra from scar tissue forming.
This can cause you to not completely empty your bladder when urinating, and that can cause your kidneys to back up and get stressed.
You do not want to stress your kidneys.
My urologist tells me, “Okay, we need to make sure you’re getting your bladder emptied as much as possible. I want you to go pee every two hours, whether you feel like you need to or not.” Which doesn’t seem like such a big deal, except that I am, as I have noted, somewhat ADHD, and if hyperfocus kicks in, I am very likely to get caught up in something for hours at a time, only dimly realizing that I’m tired/hungry/thirsty/need to pee.
I could manually set myself alarms every two hours but that would be a pain to set up, and a pain to disable if I needed to. So I’m writing myself an app to do it.
It pings me every two hours to remind me it’s time to go; if I do so early, it resets the next interval to two hours from that point. If I don’t respond, it keeps bugging me until I do.
That’s the basic idea; I’m fairly sure I’ll want to add on to it (the process of writing this post reminds me that I really do want to be able to put it in vibrate-only mode when I’m, say, at a concert), but I’m going to get the basic version done and live with it for a while.
No idea if this is common experience, but if it is, I’ll definitely put it out on the App Store.
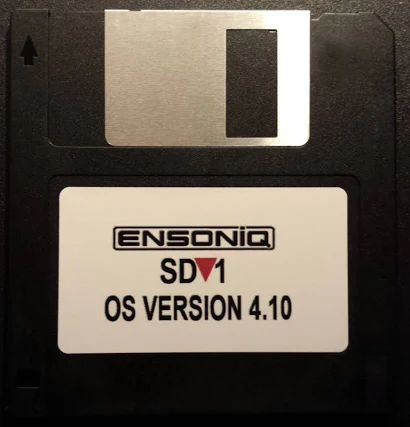
The Ensoniq SD-1 is a synthesizer from the 1990s — a ROMpler with a Motorola 68000 at its heart. Like many synthesizers of the era, it uses the cheap, easy, and simple storage medium of the day: 800K floppy disks for storage of everything: factory programs, user programs, presets (organized small sets of programs), full-up MIDI sequences, and its own operating system.
The format is proprietary and somewhat peculiar: a custom FAT, 10 sectors per track numbered 0 through 9 (not 1 through 10 like a PC), big-endian multi-byte fields throughout, and a handful of file types that the rest of the computing world has never heard of. To retrieve your data on a modern computer, or to get sounds back onto the synth, you need something that can speak this format.
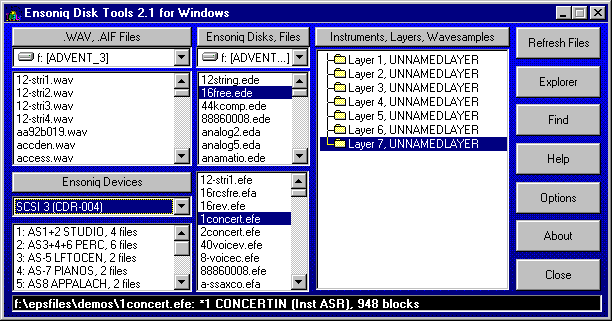
Few if any USB disk drives can handle this format; the extant programs which can read Ensoniq disks all run under MS-DOS (or Windows DOS emulation) and need a real, wired-in diskette drive to handle reading and writing disks. Forget about doing this on a Mac.
Fortunately, the SD-1 has a reasonably robust MIDI system-exclusive, or “SysEx”, implementation, capable of dumping and receiving pretty much everything except the actual sequencer OS that can record sequences to the SD-1’s internal memory and play them back. Those of us who saw the handwriting on the wall (and who didn’t want to keep a 486 tower lying around just to write the floppy disks that were becoming harder and harder to find anyway), took the earliest possible opportunity to dump everything out over SysEx and save it elsewhere.
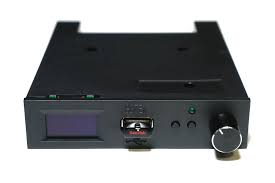
Getting the sequencer OS back into the thing still needs a diskette, which is an issue (solved by third-party add-ons that could store hundreds of floppy images on a USB stick).
The renaissance
But there was some big news in March 2026, that made the question of accessing the SD-1’s disks and data an interesting topic again.
The folks at Sojus Records announced a wrapper around the previously-created SD-1 MAME emulator that allowed the SD-1 to be loaded as a VST3 plugin.
For all of us who had SD-1’s (or who still have them, but have shifted to much-more-convenient computer-based sequencing), this was a sit-up-and-take-notice moment. Our baby was now a plugin! And all that work we’d done previously was now usable again.
However! The first release of the plugin was only able to read .IMG files — a file format created by Gary Giebler to store floppy images on disks other than floppies. This meant that there needed to be a way to get .syx SysEx files back onto .IMG images so they could be used once more.
Sure, the Giebler and Rubber Chicken utilities were still out there, but I’m a Mac guy, and attempts to get those running properly on emulated MS-DOS were pretty much a failure. What I needed was a utility that could read and write disk images on my Mac.
A year ago I would have looked at that and said, “man, I do not have the time or the patience to read all those Transoniq Hacker articles and try to piece this together.” This year, I didn’t have to have that patience: I had Claude, and $20 worth of tokens a month to spend, so I thought, why not? This is actually a fairly well-defined problem:
Documentation for the disk organization and file formats exist in this PDF archive of the Transoniq Hacker
We have some disk images that we know work with the emulator, including a sequencer OS disk
The emulator seems to be able to read .IMG files fine, so if I can figure out how to write disks, I should be able to read them on the emulator.
This is a pretty solidly mapped-out basis to start from, and I figured that with both good documentation, sample data, and a working system to test against, I stood a pretty good chance of being able to carefully steer Claude to a solution.
Getting started
I decided that I wasn’t going to be fancy here. This is going to be called sd1diskutil because it’s just going to be a wrapper around a library that knows how to do the job.
So on March 26th, I sat down with Claude in the terminal, loaded obra/superpowers, and started brainstorming. I decided that, contrary to my more recent utility projects, I’d try to produce something that could be embedded into a prettier interface than just the command line.
That meant the first decision was to what language to implement this in, and after some discussion with Claude, we settled on Rust, to allow me to make this a functional programming approach, using very tight types and operations on them. This was, in hindsight, probably colored by my experiences with Scala and really tight types, and how that made it so much easier to write correct code.
To go with that and make it usable, we came up with a very thin CLI binary (sd1cli) that could convert MIDI SysEx dumps to and from the SD-1’s on-disk binary format provide full disk management — list, inspect, write, extract, delete, create.
Because I knew that eventually I wanted to wrap this up in a pretty UI, I asked Claude how to build Swift bridging in, and it included a clean UniFFI surface for SwiftUI, allowing the same library to eventually power a macOS application.
I knew that I was going to have to be very careful to implement this correctly. File systems and custom file formats are not forgiving, and the SD-1’s OS, though quite capable, is not what you would call robust.
The architecture therefore mirrored the data as closely as possible and tried to ensure that everything was as safe and stable as possible:
DiskImage owns the raw 819,200-byte image.
FileAllocationTable is a stateless handle that operates on a &mut DiskImage to avoid Rust borrow conflicts.
SubDirectory follows the same pattern.
SysExPacket is the only place nybble encoding and decoding happens — every layer above it works in plain bytes.
Atomic writes everywhere: save to a temp file, then rename.
I started out with a blank disk template created by the SD-1 emulator. What better source for a good disk than the emulator itself? (Oh, you sweet summer child. We’ll spend about three days beating our heads against this disk image.)
The first working implementation was achieved in a single burst: we planned out the types and operations, reviewed the design, and then built an implementation plan: workspace scaffold, error types, disk image, FAT, directory, SysEx parser, domain types, the full CLI. Integration tests for every command. The code compiled. The tests passed.
Then came the reality checks.
Block 4? Or block 5?
The Giebler articles said that the FAT should be at block 5. But our empty disk image from the emulator said it was at block 4. Everything else matched up: ten blocks long, 170 three-byte entries each. What was the problem? We could write files with our code to the blank image, and the SD-1 emulator could read them.
Figuring this took way longer than it should have, for a reason that only became clear in retrospect.
The blank disk template used during early development, as mentioned above, had been written by the Sojus VST3 plugin, which it turned out was concealing a sector-shifting bug that was actually happening at the underlying MAME emulator level!
See, normal DOS disks have 11 sectors per track, numbered 1 through 11. The SD-1 disks have ten, numbered zero to 9! MAME does handle the ten sectors per disk thing fine…but it uses SD-1 blocks 1 though 9, dropping block 0 and adding an empty all-zeroes block 10. So a fresh emulator-written disk has its FAT at block 4 instead of block 5. And a freshly-written emulator disk also immediately throws a DISK ERROR – BAD FORMAT if you try to read it…but we were only trying to write it, thereby breaking it, and then read it with our Rust code!
The Giebler article in Transoniq Hacker said block 5 and our write code was written to put it at block 5, which was correct. The disk from the emulator said block 4, because the emulator dropped block 0. The emulator could read the test disks written by our code fine — because sd1diskutil‘s own writes were correct.
But whenever the emulator saved a file back, it would quietly apply the shift again, moving the FAT back to block 4, exactly matching the initial (broken, but we didn’t know it) blank disk. So we went round and round, trying to resolve this: the article says 5, the disk says 4, the emulator reads 5 and writes 4, maybe both are correct and the article didn’t have that, so we should support either, or…?
I repeatedly tried to add files to the disks written by the emulator, and they always got DISK ERROR – INVALID FORMAT. How was I screwing this up?
I finally figured it out when I wrote a file to a good (block-5) disk and immediately tried to read it back (from the now block-4 disk). The emulator immediately threw a BAD DISK error…on its own output! So the emulator was wrong (though at the time we didn’t know why — see below!), and the article was right.
We created an empty disk by taking a copy of the known-good SEQUENCER-OS disk and deleting all the files from it using our code. We then wrote a single file to it and tried it on the emulator…and the disk was readable and the file was there.
Other early problems and fixes followed the same discipline of checking what we wrote against the emulator: local filenames needed to be forced to uppercase because the SD-1’s LCD doesn’t render lowercase. We had to analyze AllPrograms and AllPresets files on the SD-1 SEQUENCER-OS disk to figure out how to write them, and analyze how these were encoded into SysEx types (the SD-1 MIDI implementation helped some, but a lot had to be worked out from just trying things until we worked them out). The free block count management logic needed a rewrite. Each fix came from trying it and checking it against what the emulator would accept, not just blindly accepting the documentation, useful though it was,
The Program Interleave Bug
Of all the bugs, the program interleaving bug was the most insidious and hardest to fix, because it was wrong in a way that “worked”. Nothing broke, the OS didn’t complain, and on first glance seemed to be completely reasonable and perfectly correct…but sequences played back with all the wrong programs if they were being loaded from program memory. (ROM patches were fine.)
Programs stored in a SixtyPrograms file are byte-interleaved on disk: there are two independent 15,900-byte streams packed together, with the even byte positions carrying programs 0 through 29, and the odd byte positions carrying programs 30 through 59.
The original SysEx-to-program bank implementation had picked then outas alternating pairs — taking a program from the first half for bank 1, program 1, then a program from the second half for bank 1, program 2, and so on. The result was that programs were extracted perfectly, but landed at the wrong bank and patch position.
I was able to figure this out by loading a custom 60-sequence file with 60 embedded programs, playing it back, and seeing that the expected patches were there but in the wrong places. Unfortunately, the fact that the last time I’d actually looked at these sequences was 2010 or so meant that I didn’t remember where the right position was! I knew they were wrong because they sounded wrong, but not where the right place was.
It wasn’t until I found a SysEx dump of one of the factory sample sequences that we were able to write that to a .IMG and load it, then compare the locations where the programs went when our file was loaded in contrast to where they ended up when they were loaded from the SEQUENCER-OS disk by writing them down by bank and slot both ways and letting Claude figure out the mapping, which it did quite nicely.
Extracting the even and odd byte streams in both the file we wrote and the “good” on-disk one, and then searching for known program names within each stream, allowed Claude to find where the one patch I definitely knew the sequence used was in both sets of interleaved data and then derive the correct mapping: a first-half/second-half split rather than alternating pairs.
In the process of figuring all this out, we created a Python analysis tool, dump_programs.py, which could extract and list individual programs from multi-program SysEx dumps and disk files. Once we verified the extraction algorithm in the Python code, we were easily able to replicate it in Rust, and test it with two other sequence-and-program dumps by verifying they played back correctly on the emulator after being written to disk from a SysEx file.
Sequences and a Deeper Problem
Extracting sequences revealed a gap in the implementation: we could write SysEx files containing sequences and patches, but we couldn’t read them. There was a function that converted SysEx to the on-disk representation, but nothing that went the other direction.
We discovered this when we realized that extraction was wrapping raw disk bytes in a SingleSequence SysEx header and producing output twice the expected size. Proper test-first setup allowed us to easily implement this properly, writing a 60-sequence-and-program file to disk, verifying it sounded correct on the emulator, and then reading it back out to .syx, verifying that the new file was a byte-for-byte match against the original.
At this point, I wrote up the block-4/block-5 bug for the Sojus folks to take a look at on GitHub. (At this point I knew that there WAS a bug, but not WHY there was a bug.) They got back to me very quickly, and confirmed that yep, the emulator was screwing up the disk, and why.
The plugin routes all floppy writes through MAME’s get_track_data_mfm_pc, a function that expects PC-standard sector numbering (1–10). As mentioned, the Ensoniq format uses 0–9. MAME silently discards sector 0 of every Ensoniq track, shifts the remaining sectors down by one, and zeros the last slot! Once the emulator rewrites the track, every block on the track contains wrong data, and every tenth block is zeroed. This was the same bug that had broken the early blank disk template and sent us chasing the wobbly FAT location for days — now fully understood, and confirmed with the Sojus developers, who identified the affected code as esq16_dsk.cpp in MAME — the DOS-to-Ensoniq-and-back block mapping.
They’re busy working that as of 3/28, but in the meantime, they found a workaround: the emulation code can also read HFE format files. HFE stores the raw MFM flux data and bypasses MAME’s sector enumeration and extraction entirely. Which is totally awesome…but the sd1diskutil code did not speak HFE, and I’d never even heard of HFE. Watching the wonderful Usagi Electric suss out data encoding has educated me a little bit on data transitions and stuff like that, but it wasn’t something I was ready to work on myself at all!
Archaeology Before Engineering
Fortunately, the Sojus folks had an HFE image with some data on it to test with: two single patches (OMNIVERSE, SOPRANO-SAX) and a 60-program file. Claude and I embarked on trying to make sense of the data in this file, and this is where Claude seriously impressed me.
We started off with this HFE file. We knew basically that it should have MFM data in it, and nothing else. Claude bootstrapped up from knowing what MFM data should look like to actually finding it in the file and making sense of this otherwise opaque stream of bits!
Claude’s first attempt at locating sector headers found nothing. The standard MFM A1* sync marker should have been there ([0x44, 0x89]) but did not appear anywhere in the file. Claude figured out that this was because HFE stores bits LSB-first per byte, in the order the read head encounters them. The standard representation is MSB-first, so at first glance the data made no sense. Claude tried a bit-reversed version of the data, then a bit-reversed-per-byte version, and found the sync marker! [0x22, 0x91], with each byte bit-reversed.
Once that hurdle was crossed, it was simple for Claude to find the markers and decode all 1600 sectors. The FAT free count in the decoded image matched the hardware OS block count: 1510. The block-to-sector mapping was confirmed against blank_image.img:
block = track × 20 + side × 10 + sector
Track geometry was pinned down: each side of a track is exactly 12,522 encoded bytes. The fixed preamble (Gap4a, sync, Gap1) consumes 284 bytes. Each of the 10 sectors is 1,148 bytes with a fixed structure. The remaining 758 bytes are inter-sector gaps — 75 bytes for sectors 0 through 8, and the rest absorbed by sector 9.
I would have taken quite a long time and a lot of poring over the MFM spec and a lot of trial and error to figure this out, if ever, and Claude had it all doped out in half an hour or so.
At this point Claude knew how to read an HFE file but not what we should do with it.
We invoked the brainstorm/design spec/implemetation plan path again. I proposed that what we needed was a translation layer: just get the HFE image to an IMG image, and all of our tools could easily handle it. To use it on the emulator, we’d just convert the IMG image back to HFE, which the emulator should safely be able to read and write.
Superpowers wrote a complete design spec before any Rust code was touched, pulling in all the information Claude already had at hand about how the HFE files work, writing Python code to cross-check assumptions made in the spec: exact constants, the complete MFM encoding rules, CRC16-CCITT coverage, the interleaved side storage layout, error variants, test cases, the works.
Then superpowers wrote the implementation plan, with concrete function signatures, and specific expected outputs, all properly built as functions on types and easily testable.
HFE Implementation, going full vibe
At this point it was Claude’s party. I had read the spec and the plan, and everything looked reasonable, but I didn’t really know the HFE spec solidly enough to critique the code.
Claude created three new error variants: InvalidHfe, HfeCrcMismatch, HfeMissingSector, each carrying track, side, and sector context so errors are never ambiguous. Then hfe.rs itself: 771 lines creating the full encode/decode pipeline, and new CLI subcommands hfe-to-img and img-to-hfe to encode and decode HFE images.
The superpowers code review caught one bug: header offset 17 — the “do not use” field in the HFE v1 spec — was being written as 0x00. The spec requires 0xFF. A strict HFE reader would reject the file, and we knew the right answer, so…easy fix.
After implementation, the code passed all the low-level tests, and read_hfe on the sample HFE file properly decoded all 1600 sectors, returning a DiskImage whose directory listed OMNIVERSE, SOPRANO-SAX, and 60-PRG-FILE with the correct free block count. A complete round-trip from .img to HFE and back produced a byte-for-byte identical result.
The Acid Test
The final test of the HFE pipeline started with the Sequencer OS disk: an 800K image containing every file type the SD-1 supports: Thirteen OneProgram files. Eleven SixPrograms banks. A ThirtyPrograms bank, eight SixtyPrograms banks, four TwentyPresets banks, eight sequence files of various sizes, and the sequencer OS binary itself (656,384 bytes!), totaling forty-nine files, and leaving just five free blocks.
The disk was encoded to HFE and loaded into the emulator. Success! The emulator accepted the disk, an everything was present. I selected the sequencer OS, hit load, and it was loaded successfully. A previously-loaded sound bank in emulator memory contained a program named GREASE-PLUS, definitely not one already on the disk. I saved it to the HFE disk, and it wrote successfully.
We decoded the modified HFE file to an IMG and listed the contents: fifty files. Three free blocks. GREASE-PLUS in disk slot 13, a OneProgram file, two blocks. Complete success!
Future Plans
Now that this is done, I plan to release it on GitHub as a library. If I get around to writing the pretty GUI, I will probably see if I can sell that, because why not? The Giebler disk utilities still sell for $60!
At any rate, the CLI will be out there and should work, for anyone who wants to build it themselves.